Friday, January 13, 2017

3 Ways NOT to FAIL When Introducing Book Clubs

Participating in a book club CAN and SHOULD be an amazing experience for ALL kids. I have read all about it, watched videos, and consulted with colleagues, BUT they were never successful in my classroom. I struggled with how to get students involved in their book without ME. I couldn't figure out how to get students to dive into their "roles" and take ownership of their club. I am ELATED that after spending YEARS of failing, or we can call it "experimenting," I finally have book clubs that have turned into collaborative groups where ALL students are engaged, on task, and EAGER to share their thinking!!! Here are three tips I've learned along the way that helped me NOT FAIL when introducing book clubs.

#1 COLLABORATION!! What I think made a HUGE difference was having students work through
their understanding of working collaboratively together. Let's be serious, a book club is a collaborative group, so it's really important for students to know and understand what one is. I put students in their clubs and on easel paper I wrote out the following 5 questions (each group had their own):

  • What does the word “collaborate”mean? 
  • What makes a discussion collaborative?
  • What does it mean to “build on others’ ideas”? 
  • What words or phrases can you use to link your ideas to your classmates’ ideas in collaborative discussion? 
  • What are some positive way to contribute to a meaningful discussion? 

Once each group completed the questions, they spent time sharing their ideas. We discussed each question in depth and came to the realization... Building on others' ideas helps create collaborative groups. We watched a video of a collaborative group (I found one online) and we discussed and charted how each member was contributing to the collaborative group. This was important for students to see what it actually looked like too.

# 2 ROLES! ROLES! ROLES! Students LOVE to have a role. I created a bunch of different book club roles and then let each student pick their own role. Some of the roles were: Word Whiz, (this person kept track of words that they or others may find confusing) Summarizer, (this person summarizes the most important part of the chapter) Character Reporter, (this person reports on the character, anything knew they noticed, character traits, character change, etc.) and many more. I simply checked out Pinterest and created a bunch that would fit my classroom. I also picked ONE student from each group to be the teacher. I picked someone who I knew would be serious and help the group to remain I task. I also let my class know that the teacher can change, but you have to earn it. This was HUGE! Each student begged to be the teacher and therefore I noticed how many of my students who are usually off task, started to become engaged and participating in their group! WOOHOOO!!

#3 MODEL! MODEL! MODEL! Once my students were ready to dive into their book club, I made a
point to model as much as possible. I would share my thinking and how I was able to keep the conversation going by building on others' ideas (when I would pop in and out of different groups)! I was not only the model, but I let other groups model as well. I also videotaped each group, I simply grabbed my I-phone and while they were submerged in their groups, I videotaped their collaborative conversations. This was eye-opening to my students. When they were able to see themselves and critique one another, they were able to see how productive or unproductive their group was! This was a game changer!! After viewing themselves against other groups, they really uped their game and implemented things they noticed other groups were doing successfully! I felt like a ROCK STAR seeing how each student strived to be an active participant in their collaborative group!

Getting Book Clubs started is the hardest part. I went very VERY slow because I wanted to make sure they had the fundamentals. If I didn't ease into the clubs slowly, it would have been a disaster because students wouldn't truly understand the collaboration aspect and their expectations. I used to rush into clubs and then become frustrated because they weren't working collaboratively and were off task. I realized that SLOW and steady wins the RACE! Going slow made the world of difference! I'm honestly in awe when I sit back and simply listen to the discussions going on during club time.

#teachersuccess :)

Wednesday, January 11, 2017

Manageable Flexible Seating Options That Work!

I am very blessed because my classroom has awesome seating options. No, they weren't cheap, but some I made and purchased myself and others I wrote and received grants for this year. I have three rotating classes of 24 students each, so these seats get used by 72 students a day. Plus, my teacher friends and I love them during meetings in my classroom.

My classroom is not the only room that has moved to flexible seating, in fact two awesome teachers at my school just received a grant to give each classroom a few more hokki stools, so now all classrooms will have options.

I am always being asking about what is in my classroom, so I thought I'd list the items below. I can't tell you what my students like the best because each student finds what works best for them. During the week, options rotate so it is fair for everyone, but I am finding more and more students know what they need (as far as seating) to produce their best work.

Today I snapped some pictures in the classroom and it made me laugh at all the different options kids had and used. I loved that some of them are even just standing to get work done. I have two rugs in my classroom, yet some students still like the cold, hard tile floor. lol

I find flexible seating options are actually manageable as long as you set your expectations and norms in the classroom. I've seen a huge decrease in stress, negative behavior, and anxiety due to flexible seating options as well.


I hope this post has inspired you to try out some flexible seating options. If you are already trying out flexible seating in your classroom, I'd love to hear about it. What works for you? What is your favorite? Personally, I sit on a Gaiam Balance Ball Chair when I am at my desk and LOVE it. Let me know what you use in the comments below!


Joe Boxer College Foam Filled Chairs
2 Crate Benches
Stools
Wobble Cushions
Hokki Stools
Gaiam Balance Ball Chairs


Saturday, January 7, 2017

4 Simple Ways to Integrate Science into Language Arts!

We all know teaching has a lot to do with time management and honestly that can be one of the hardest things teachers face.

"How am I supposed to teach everything in this little amount of time?"


When you factor in band lessons, trips to the bathrooms, nurse visits, absences, weather delays/cancellations, vacations, professional development days, meetings teachers are pulled out of the classroom for, speech therapy, counseling, resource/intervention time, and the list could definitely go on....how much time do you really have for teaching?


#1. My first suggestion is to get the Scholastic magazine, Science Spin. It is SO worth it. It is connected to grade level NGSS standards, is full of nonfiction reading passages, graphs, charts, color pictures, and is really popular with all of my students. They cheer when new magazines come in the mail and honestly so do I. I love the included Teacher's Guide that has everything you need to teach content and reading all in one. It even comes with close reading questions! This will cost you $0.99 /per student for 8 issues throughout the year, but honestly parents could send their child in with a dollar for this monthly magazine! It is SO worth it!

#2. Book Clubs! Do you use book clubs in your classroom? They are great for promoting student questioning, group discussion, responsibility, and accountability. How about throwing in some nonfiction science books once in a while? Obviously the questions students come up with might be a little different other than the normal character development and plot predicting, but nonfiction books do allow for higher level thinking and really ALL students LOVE nonfiction!

One of the best ways to face this challenge is through subject integration. I am not talking about just teaching science by reading articles, but you CAN pre-teach a topic by reading articles in class, which will give you more hands on time when it comes to the actually allotted science block.

The books below are for five different leveled groups going on in my classroom. Don't think you have time for this? Make it morning work for book clubs to meet, end the day with book clubs, or replace independent reading time with group reading time a few times a week.

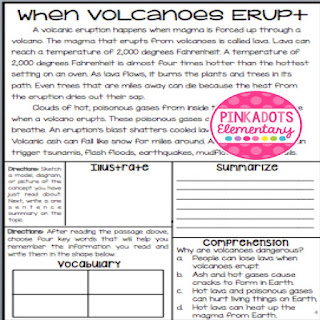
#3. Our science packets offer an AMAZING opportunity for students to learn science through reading, answering comprehension questions, and using text evidence to support paired text responses. We have science packets for over twenty different topics covered in 4th and 5th grade science. Each unit provides five opportunities for a student to read about the topic while organizing their thoughts in illustrations, vocabulary boxes, and summary writing.  

https://www.teacherspayteachers.com/Product/Science-Articles-10-Pack-Bundle-Deal-Paired-Text-Comprehension-Questions-2319724

https://www.teacherspayteachers.com/Product/Science-Articles-10-Pack-Bundle-Deal-Paired-Text-Comprehension-Questions-2319724


https://www.teacherspayteachers.com/Product/Science-Articles-10-Pack-Bundle-Deal-Paired-Text-Comprehension-Questions-2319724

I've used these for homework, intervention, pre-teaching, sub-plans, extensions, and even guided reading opportunities. Students love the short/readable passages and teachers love that their class has the opportunity to independently understand difficult topics. When making these, I broke down hard topics into five sections so my students find success in reading and comprehension. The best part is the students actually enjoy the new learning and when I send it home for homework, the parents enjoy hearing the interesting passages.

Check out what some teachers have to say about these reading passages. I really appreciate all the positive feedback I receive from other teachers, it motivates me to create more! Thank you all! :)


#4. Have a few minutes? This Nonfiction kit is awesome for grades 4-6. I purchased it through Lakeshore Learning and I've got a ton of use out of them. I've scanned them onto the smartboard for whole a class lesson. I've used them for more information on a topic. I've given these to my students to complete in partnerships and (my favorite idea) I've blown then up on giant paper and hung it up in the room for students to read when they finish work. After leaving it up for a week or so everyone was able to read it at some point and then we worked on the comprehension questions. They definitely inspired the students to investigate the topics more. They are pricey, but if you have curriculum money or want to write a www.DonorsChoose.org grant, this would be a great purchase!


FYI: I was not paid to promote any of these companies, I just love science! :)


Tuesday, October 25, 2016

Energy Can be Moved from Place to Place: Creating a Whole Class Circuit!

 Have you ever seen one of these little Energy Balls? They can be picked up online at any science retailer, but I had never played with one until my sweet science partner purchased me one this week for me as a gift.

My fourth graders have been learning about the transfer of energy for the past few months and we have been trying very hard to focus on making observations and using our observations as evidence to prove a claim on a scientific phenomenon. Pretty cool for 4th grade, right!?

Today we had a few extra minutes and I gave the class the challenge of working together, using this energy ball, and proving the scientific principle: energy can be moved from place to place.

They quickly figured out how to work the ball (both metal pieces need to be covered), but a few students started to form a circle and tested to see if their arms could act like wires in a circle. They were SO EXCITED to see that it worked.

Before long, the whole class formed a circle and one boy practiced being a "switch" letting go and grabbing the hand next to him.

I loved that I gave my class a challenge and not only were they able to use their knowledge from the unit and communication skills to figure it out, but they also extended the idea and went above and beyond.

Check out my recent Instagram post for a GIF of this energy ball in action! 


This quick energy transfer investigation really solidified the idea of an open and closed circuit and definitely blew the minds of my fourth graders. 


Thursday, October 20, 2016

{Freebies} Simple Ways to Motivate Students in the Classroom!

We've hit that time of year where the start of school has passed and the end isn't in the direct future. Honeymoon period is now over and we are starting to see the true colors of many of our little gems. Don't get me wrong, we still love each and every one of time, but some of our friends need a little extra motivating. I thought I'd share a few SIMPLE ways to make your students want to be ready to learn in your classroom, but I'd also love to hear about your tricks in the comments below!

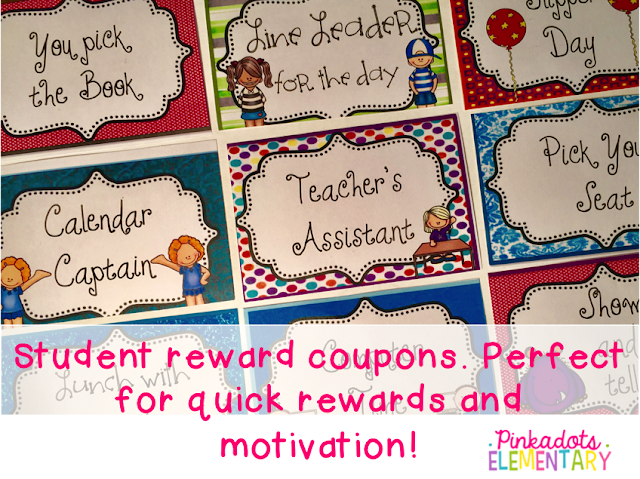
Class Coupons! Seriously, there couldn't be an easier behavior incentive.  Have you seen our awesome teacher friendly Classroom Reward Coupons? The packet comes with over 60 options and each coupon is printed on a page 6 times! One print of the bundle and you should be set for the year! The best part about using these coupons is that the rewards are mostly free and require no prep! 

https://www.teacherspayteachers.com/Product/Reward-Coupons-60-Coupons-PERFECT-for-Classroom-Management-542106

https://www.teacherspayteachers.com/Product/Reward-Coupons-60-Coupons-PERFECT-for-Classroom-Management-542106

 I simply print, laminate, pass out, and collect to redistribute when the student cashes their ticket in. 

Students go nuts over these little tickets, especially "Lunch with the Teacher" and "Show and Tell" because lets face it, who ever has time set aside for a class show and tell.

Other tickets that have been known to popup in my classroom are Leprechaun Tickets and Desk Fairy Tickets. (Get them BOTH for free by clicking on the links or pictures!) My students love visits from leprechauns in March. Sometimes our secret leprechaun even brings treats, just like our mystery desk fairy! The Dollar Tree is a great place to pick up little trinkets. One of my favorites are the round glass stones. The kids love these because they think they are leprechaun treasures. I also love getting a dozen pencils here for $1.00. Really anything at the Dollar Tree is gold to students. 

https://www.dropbox.com/s/g4a0fo60inu5dj5/desk%20fairy.pdf?dl=0

https://www.teacherspayteachers.com/Product/Leprechaun-Desk-Cards-Freebie-Positive-reinforcement-for-clean-desks-595268

These are only a few motivating ticket ideas, but I am sure you have others. Check back for more ways to motivate students through recess, not extra recess, but organized teacher/student games at recess. I mean what student doesn't want to dominate their teacher at a game of four square?


Tuesday, October 18, 2016

Sharing My Love for My Oriental Trading Goodies!

Early in the school year,  I was lucky enough to test out some products from Oriental Trading Company. Honestly, I never really thought to look through their website for back to school supplies before, and never even knew it was something they carried. When browsing the selection I was blown away by the products I wanted needed in my classroom. As a ten-year teacher, I didn't think I needed too much, but to my surprise, my cart filled up quickly. I am always up for trying something new and in all honesty, if I can do something fun and positive to motivate my fourth graders, I am all for it!

A few of my favorite items I chose were jumbo lollipops, mini stamp pens, owl magnets, and planet stress balls. 

I love the planet stress balls as much as my students do! Believe it or not it is mid-October and they are holding up great. I allow my students to borrow a planet if they feel the need to use one, but they must return it before leaving my classroom. Sometimes, students just need to have something in their hands to fidget with while they listen or read and I found these planets perfect for this occasion. Not only are they the perfect size for a child's hand, but are adorable. I can see these being used to create a model of the solar system or even being hung with string from the ceiling for a decoration. Next year, I will order these again, but get a class set.  


The stampers are super fun for correcting papers. At first I was going to use them for Valentine gifts, but I decided to whip them out for motivation on quizzes. The students are allowed to stamp their paper if they score a 3 (standardized grading over here) and they LOVE these stamps. They look like the little conversation hearts that are eaten as candy and even have fun sayings. The stamps come in green, orange, purple, blue, and yellow and are self inking. We have used them A LOT and they are not even running low. I love the ease of these stamps, but do wish they were a little larger!


 Have you seen these magnet owls? They are AMAZING for graphing opinions on a white board. Sometimes for morning work I ask the students a survey question and they have to decide, choose, and vote. Most of the time the first students create the graph and work as a team to make it make sense to the rest of the class (like in our current vote pictured below). Sometimes, I have the students use dry erase markers to write their names on the owl, but other times, I like them to vote autonomously so I can get honest answers. I've had LOADS of compliments on these adorable owls and many teachers have also ordered them for similar ideas. My fourth graders love them and I love that they are working on their graphing skills and interpreting data while having fun! 


My favorite item ordered were the JUMBO lollipops. Look at the smile on this sweet face and that alone could sell the product. I made rainbow birthday tags for each of my students and taped them onto the lollipops. The students receive this lollipop on their birthday or in June (if they have a summer bday). I did get enough for everyone and believe it or not they were all in perfect shape when they arrived. Not ONE crack! I originally wanted to make a giant lollipop bouquet for a decoration, but our school is mouse infested and I didn't think that was a good idea. I have them in a box, in a plastic sealed container, in a closet and they seem to be safe!  I will definitely be purchasing these again next year. I love giving away a special birthday treat and the students really look forward to it! 


So these are some of my great items from Oriental Trading Educator's Catalog and like I said, everything arrived fast and in perfect condition. I will definitely be ordering from them again in the future! I am already scouting out the Thanksgiving and Christmas crafts and gifts for my students!


Thursday, June 23, 2016

DIY Name Sign Tutorial! Perfect in the Classroom or as a Gift!


If you check out my Instagram, which I am always posting to, you will see that I finally have time to craft this summer. I have lots of projects for my TPT store and crafts for my classroom I want to create and I am slowly checking them off my list. This summer I have three weddings and besides money, I always love to give a homemade gift. Especially if they are close friends, something homemade definitely comes from the heart and adds a personal touch. What is better than a personalized sign with your new last name? I know I'd love one, and maybe someday soon, I'll have time to make myself one. haha

So on Instagram, a few people asked me to create a tutorial on how to make wooden signs...


1. Obtain wood. I was lucky and found a few scraps in the garage that were about 14in X 5in X 1in each. If the wood isn't perfect, don't worry, it adds character to the sign. 

2. I use my cricut explore to cut the saying or name out of vinyl. I use letters or words from this vinyl as a stencil, so it does not matter what kind or color vinyl you use. 

3. Paint the wood with one color. In both of my pictures, these signs were first painted with a navy blue acrylic paint. It dried super fast. 

4. Lay the vinyl down on the wood. I use transfer tape to get my vinyl from the backing to the wood and it works great.

5. I don't know why, but I read somewhere to paint another layer of the original color after the vinyl is stuck down. So I painted another layer of the blue and let it dry. 

6. Next I used a cream colored chalk paint (randomly bought it at Walmart and loved how the color turned out). It is important in this step to start the paint at one side and drag the brush to the other side. Try not to stop in the middle or you will get marks...like in the 2nd picture. Those two signs were actually my first try. If you notice in the top picture, the white paint was much more even when applied. I also added a 2nd coat of white paint to those signs and love the contrast between navy and white. 

7. No need to wait for the top coat to dry, grab tweezers or a Cricut weeding tool and pull the vinyl up now. Be sure you grab all the vinyl, in the top picture I forgot to pull up the . after EST, but it was an easy fix. 

8. Once the vinyl is up and the top coat of paint is dry, grab some sand paper and sand the sides and front. Don't worry about over sanding, the wood lines gives the sign character and depth.

9. Clean off the board with a damp paper towel and allow the board to dry nicely. 

10. Time to seal the sign. I use a super light coat of Triple Thick Gloss Glaze. It basically dries as you put it on.

Tadaaa.... you are done! I do love my Cricut because the design and crafting possibilities are endless! I hope I did a good job explaining, if you have any questions, please let me know in the comments below. I am making two more signs tomorrow, so pictures will be added with each step! :)